Pattern Creation for Oasis Mini - Sandify BasicsUpdated 6 months ago
Sandify is an excellent open-source tool primarily created and improved by Jeff Eberl and Bob Carmichael. It allows you to create beautiful, mathematically driven patterns for your Oasis Mini. In this tutorial, we’ll go over the very basics of using sandify.
Step 1:
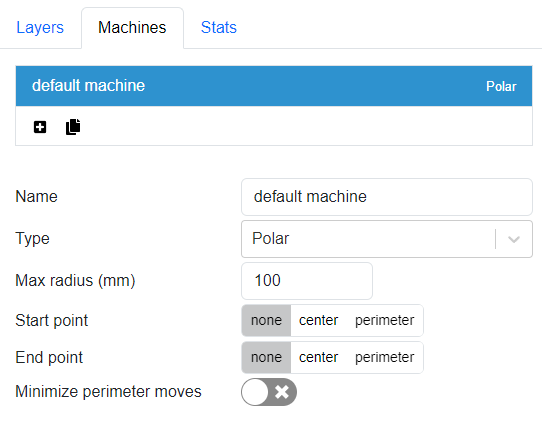
Visit Sandify.org. This is the main screen you’ll be greeted by. Click on the machines tab on the left.

Step 2:
Enter the configuration settings for Oasis Mini. Change the “Type” to Polar. Change the “Max Radius” to 100. Keep everything else the same.

Step 3:
Go back to the “Layers” tab and create your design! Sandify has a ton of features which we’ll dive into deeper in future tutorials. We’ll go over the very very basics here, and you should experiment on your own! Click the “+” icon to create a new layer, and pick one from the dropdown. There are a ton of options here!

Step 4:
Adjust your design. Each of the different types have their own customization options.

Step 5:
Use layer effects to bring your designs to the next level. Click the “Add Effect” button to add more advanced customizations to each layer. We’ll show the “loop” option, but you should try them all!

Step 6:
Once you’re finished, it’s time to save your pattern! In Sandify, click “File” then “Export As” select “Theta Rho” from the first dropdown, name your file, and hit Download! Save it in a place where you can find it later.

Step 7:
Go to https://app.grounded.so. Login using the same username and password or method as you use for the Oasis Mini app. Hit “Add new” under “My Patterns” then name and upload your pattern. We recommend that you make it public so that others can enjoy it! We’ll quickly review your pattern before publishing it for everyone else to enjoy.
Step 8:
Sit back, relax, and let Oasis Mini do the work! Sandify unlocks a ton of possibilities, and we haven’t even scratched the surface here. One of the best ways to learn is to play around with it on your own!